Transform your Space with DIY Molding
Step 1 - The Vision
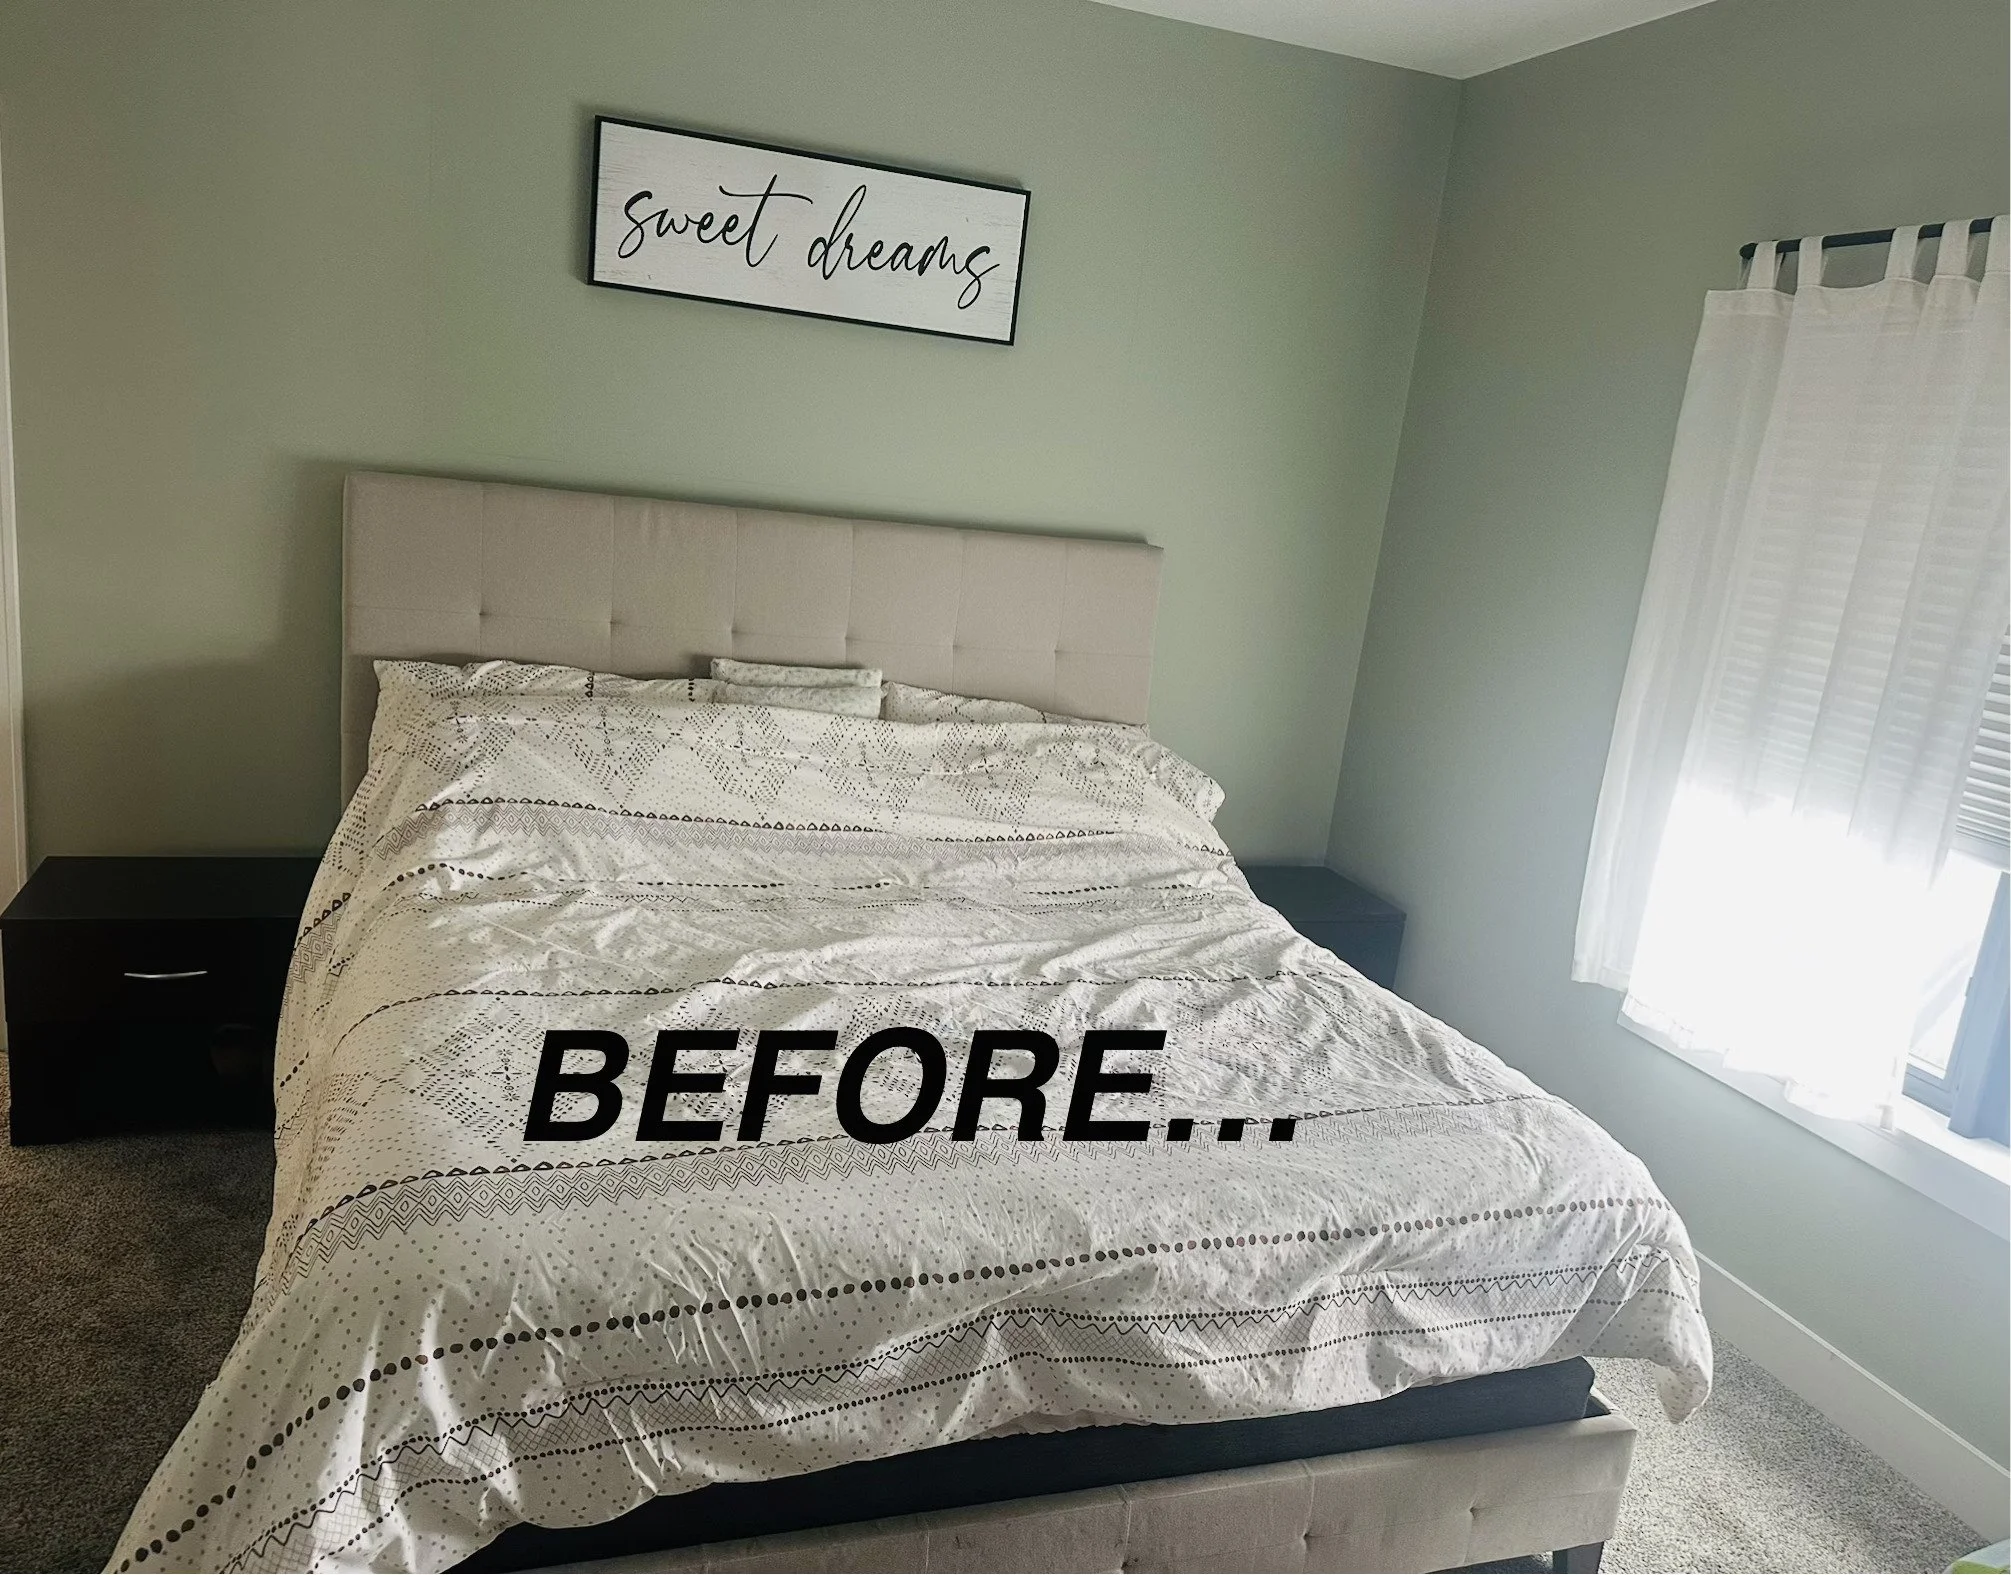
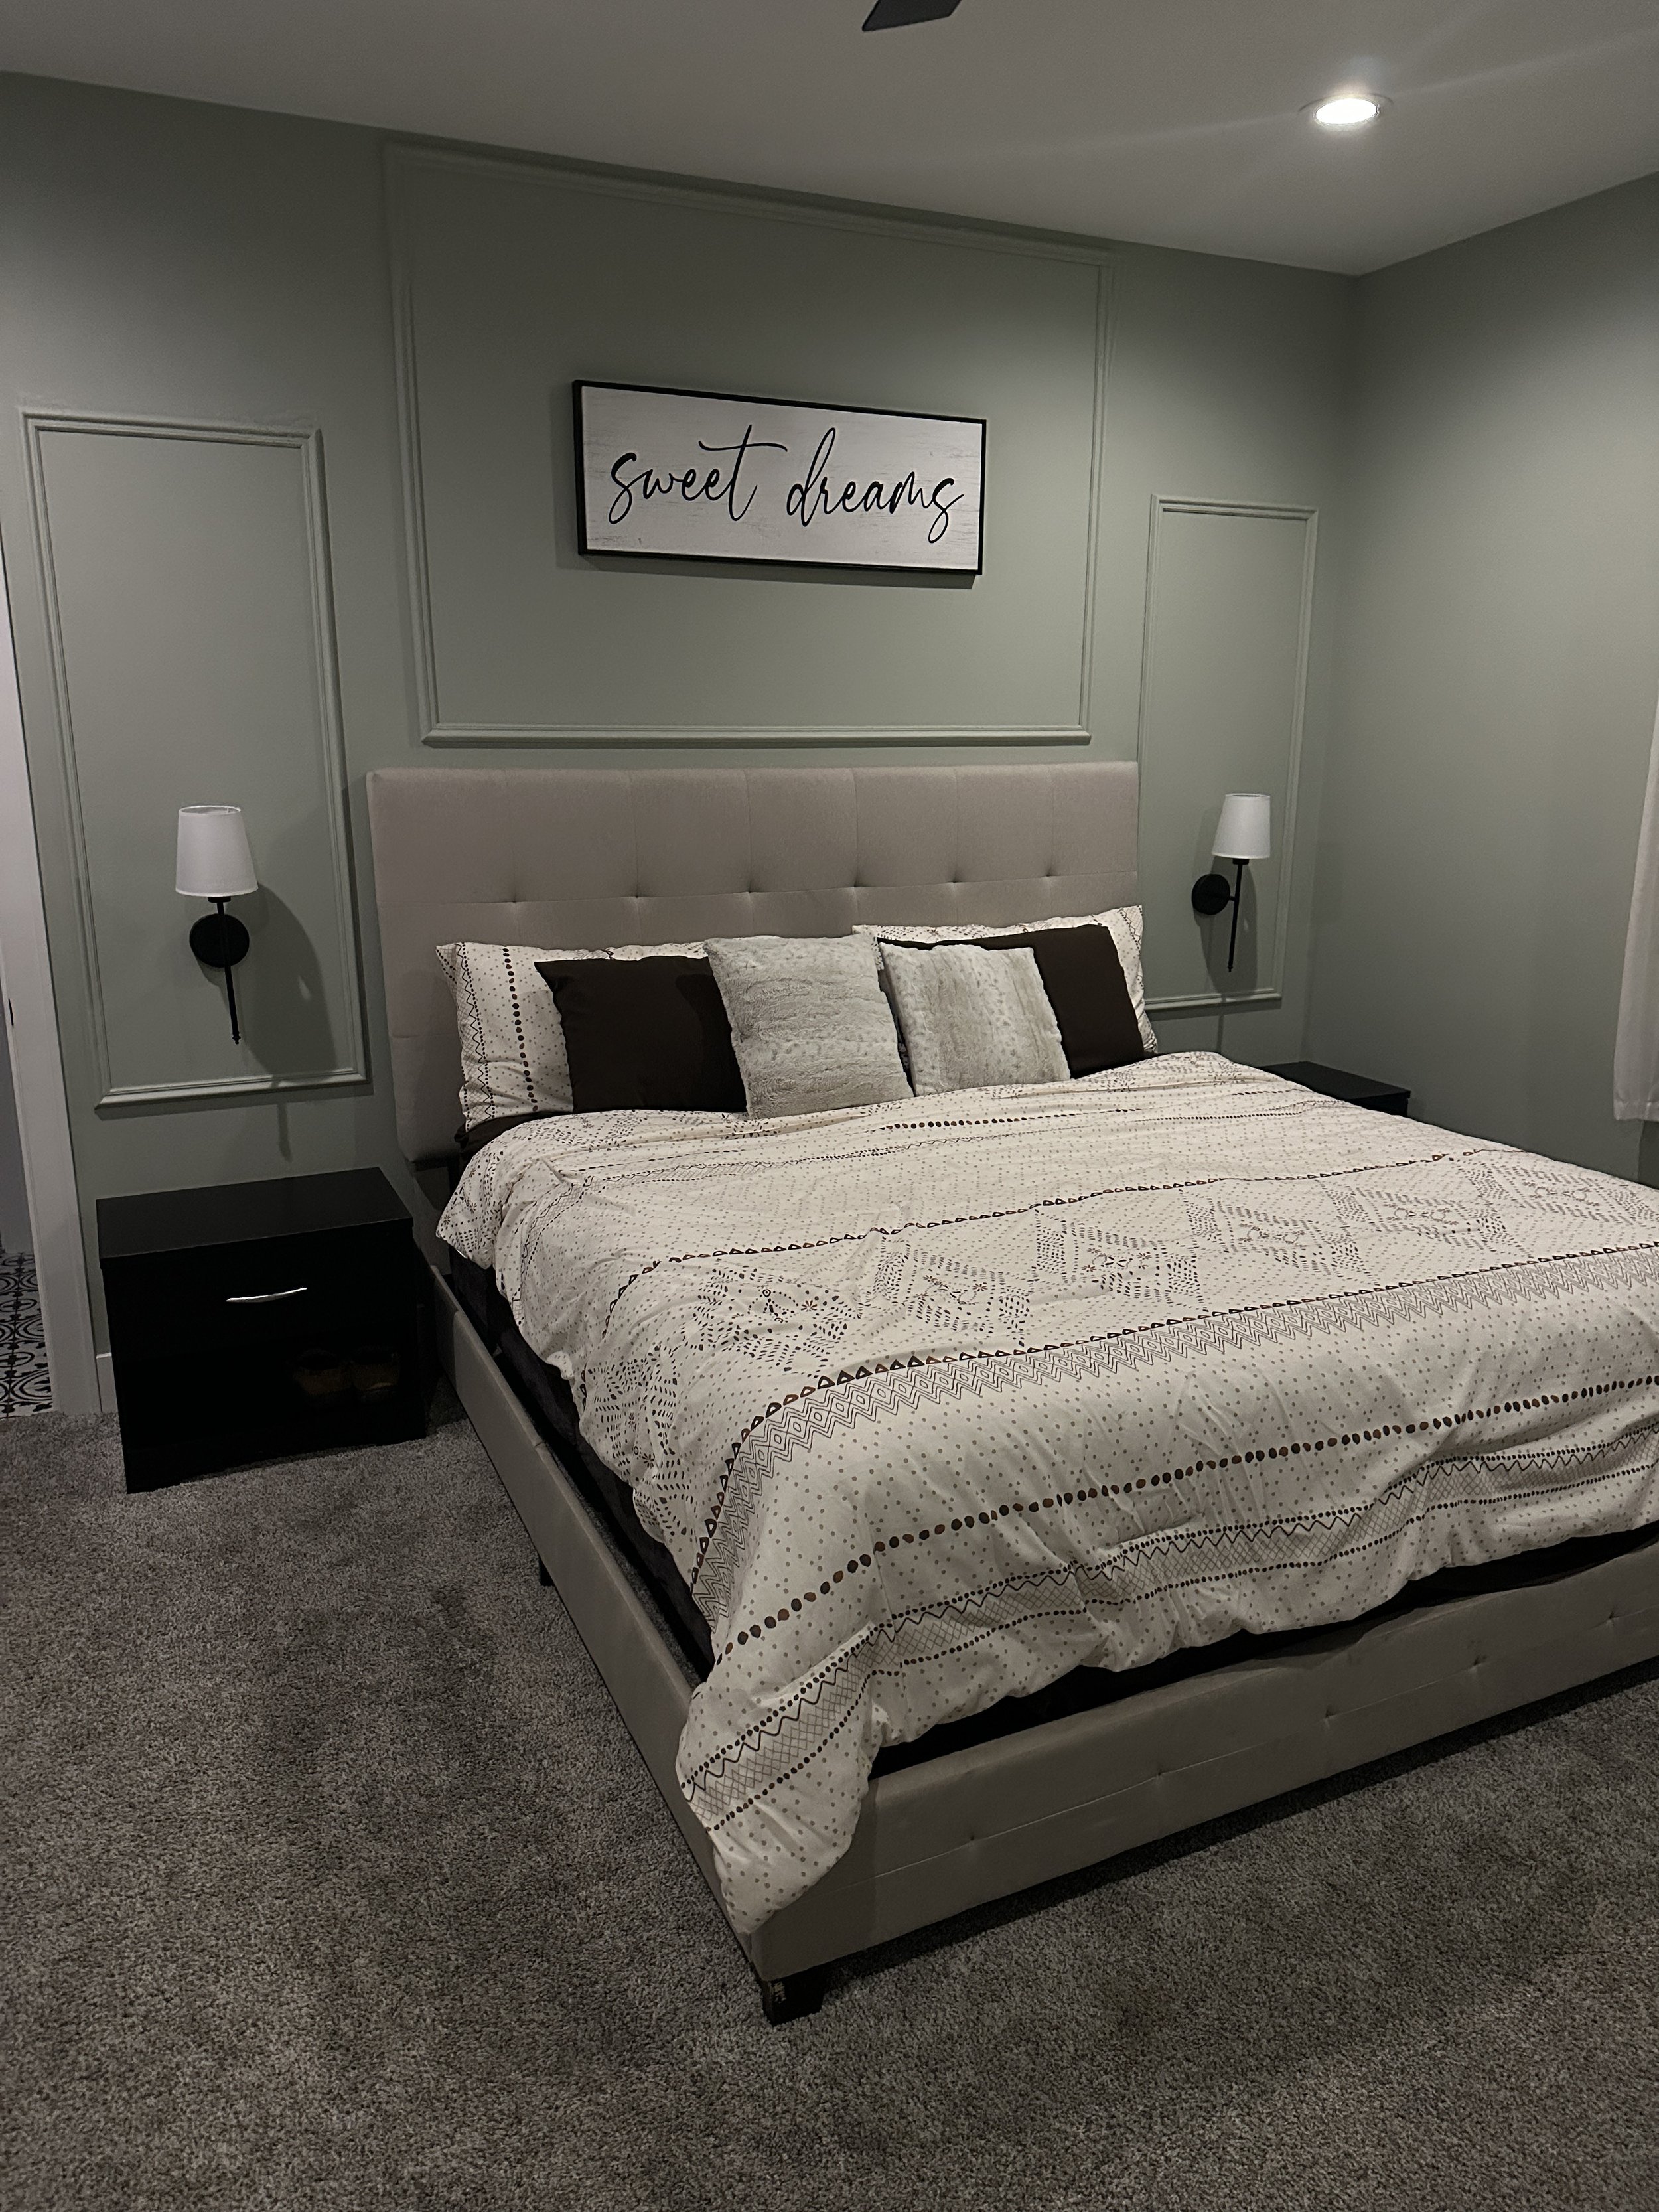
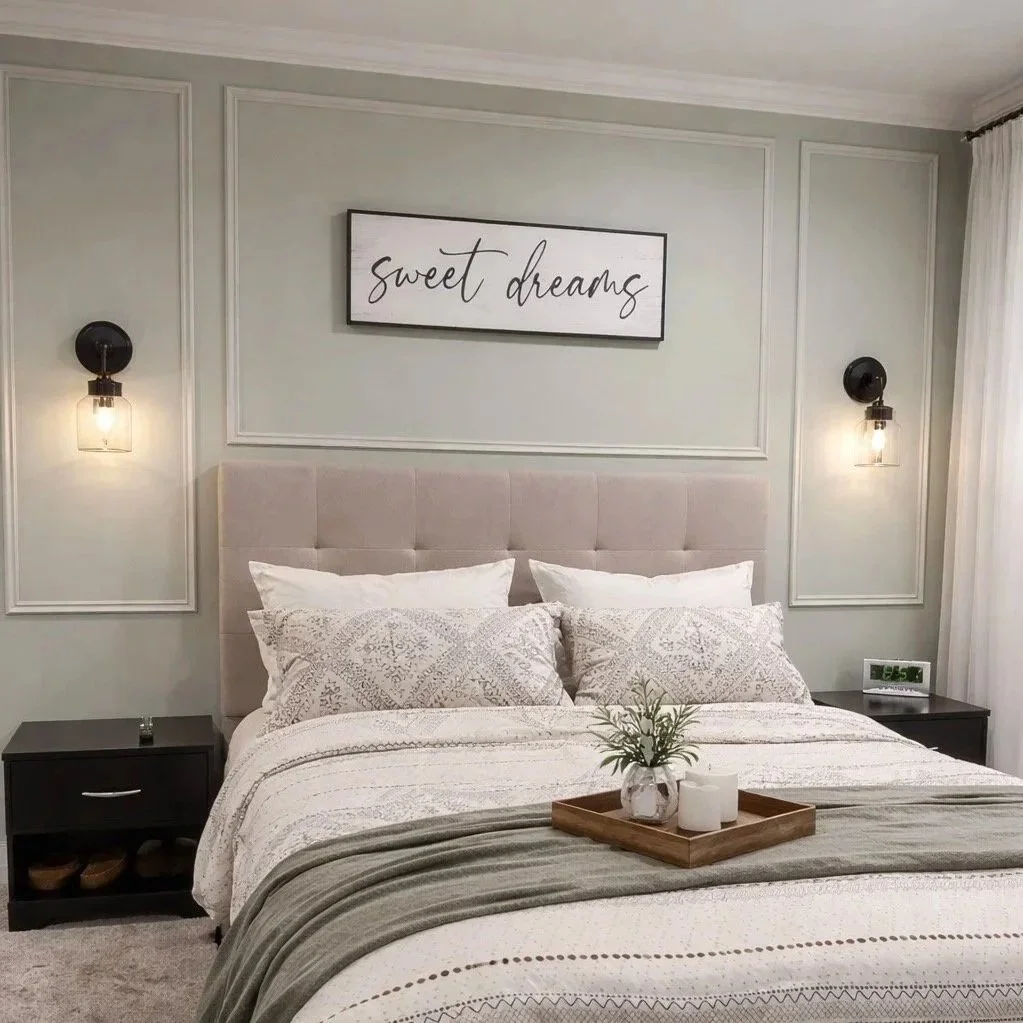
Every great project begins with a clear vision. Defining your goal helps ensure the design feels intentional, while a visual reference keeps your inspiration front and center throughout the process. For our primary bedroom, I wanted to introduce a sense of sophisticated elegance without overwhelming the space, as the room isn’t overly large. Wall molding felt like a great way to elevate the room while preserving calm, clean lines.
This image was generated using AI for visionary purposes.
Step 2 - Planning & Measurements
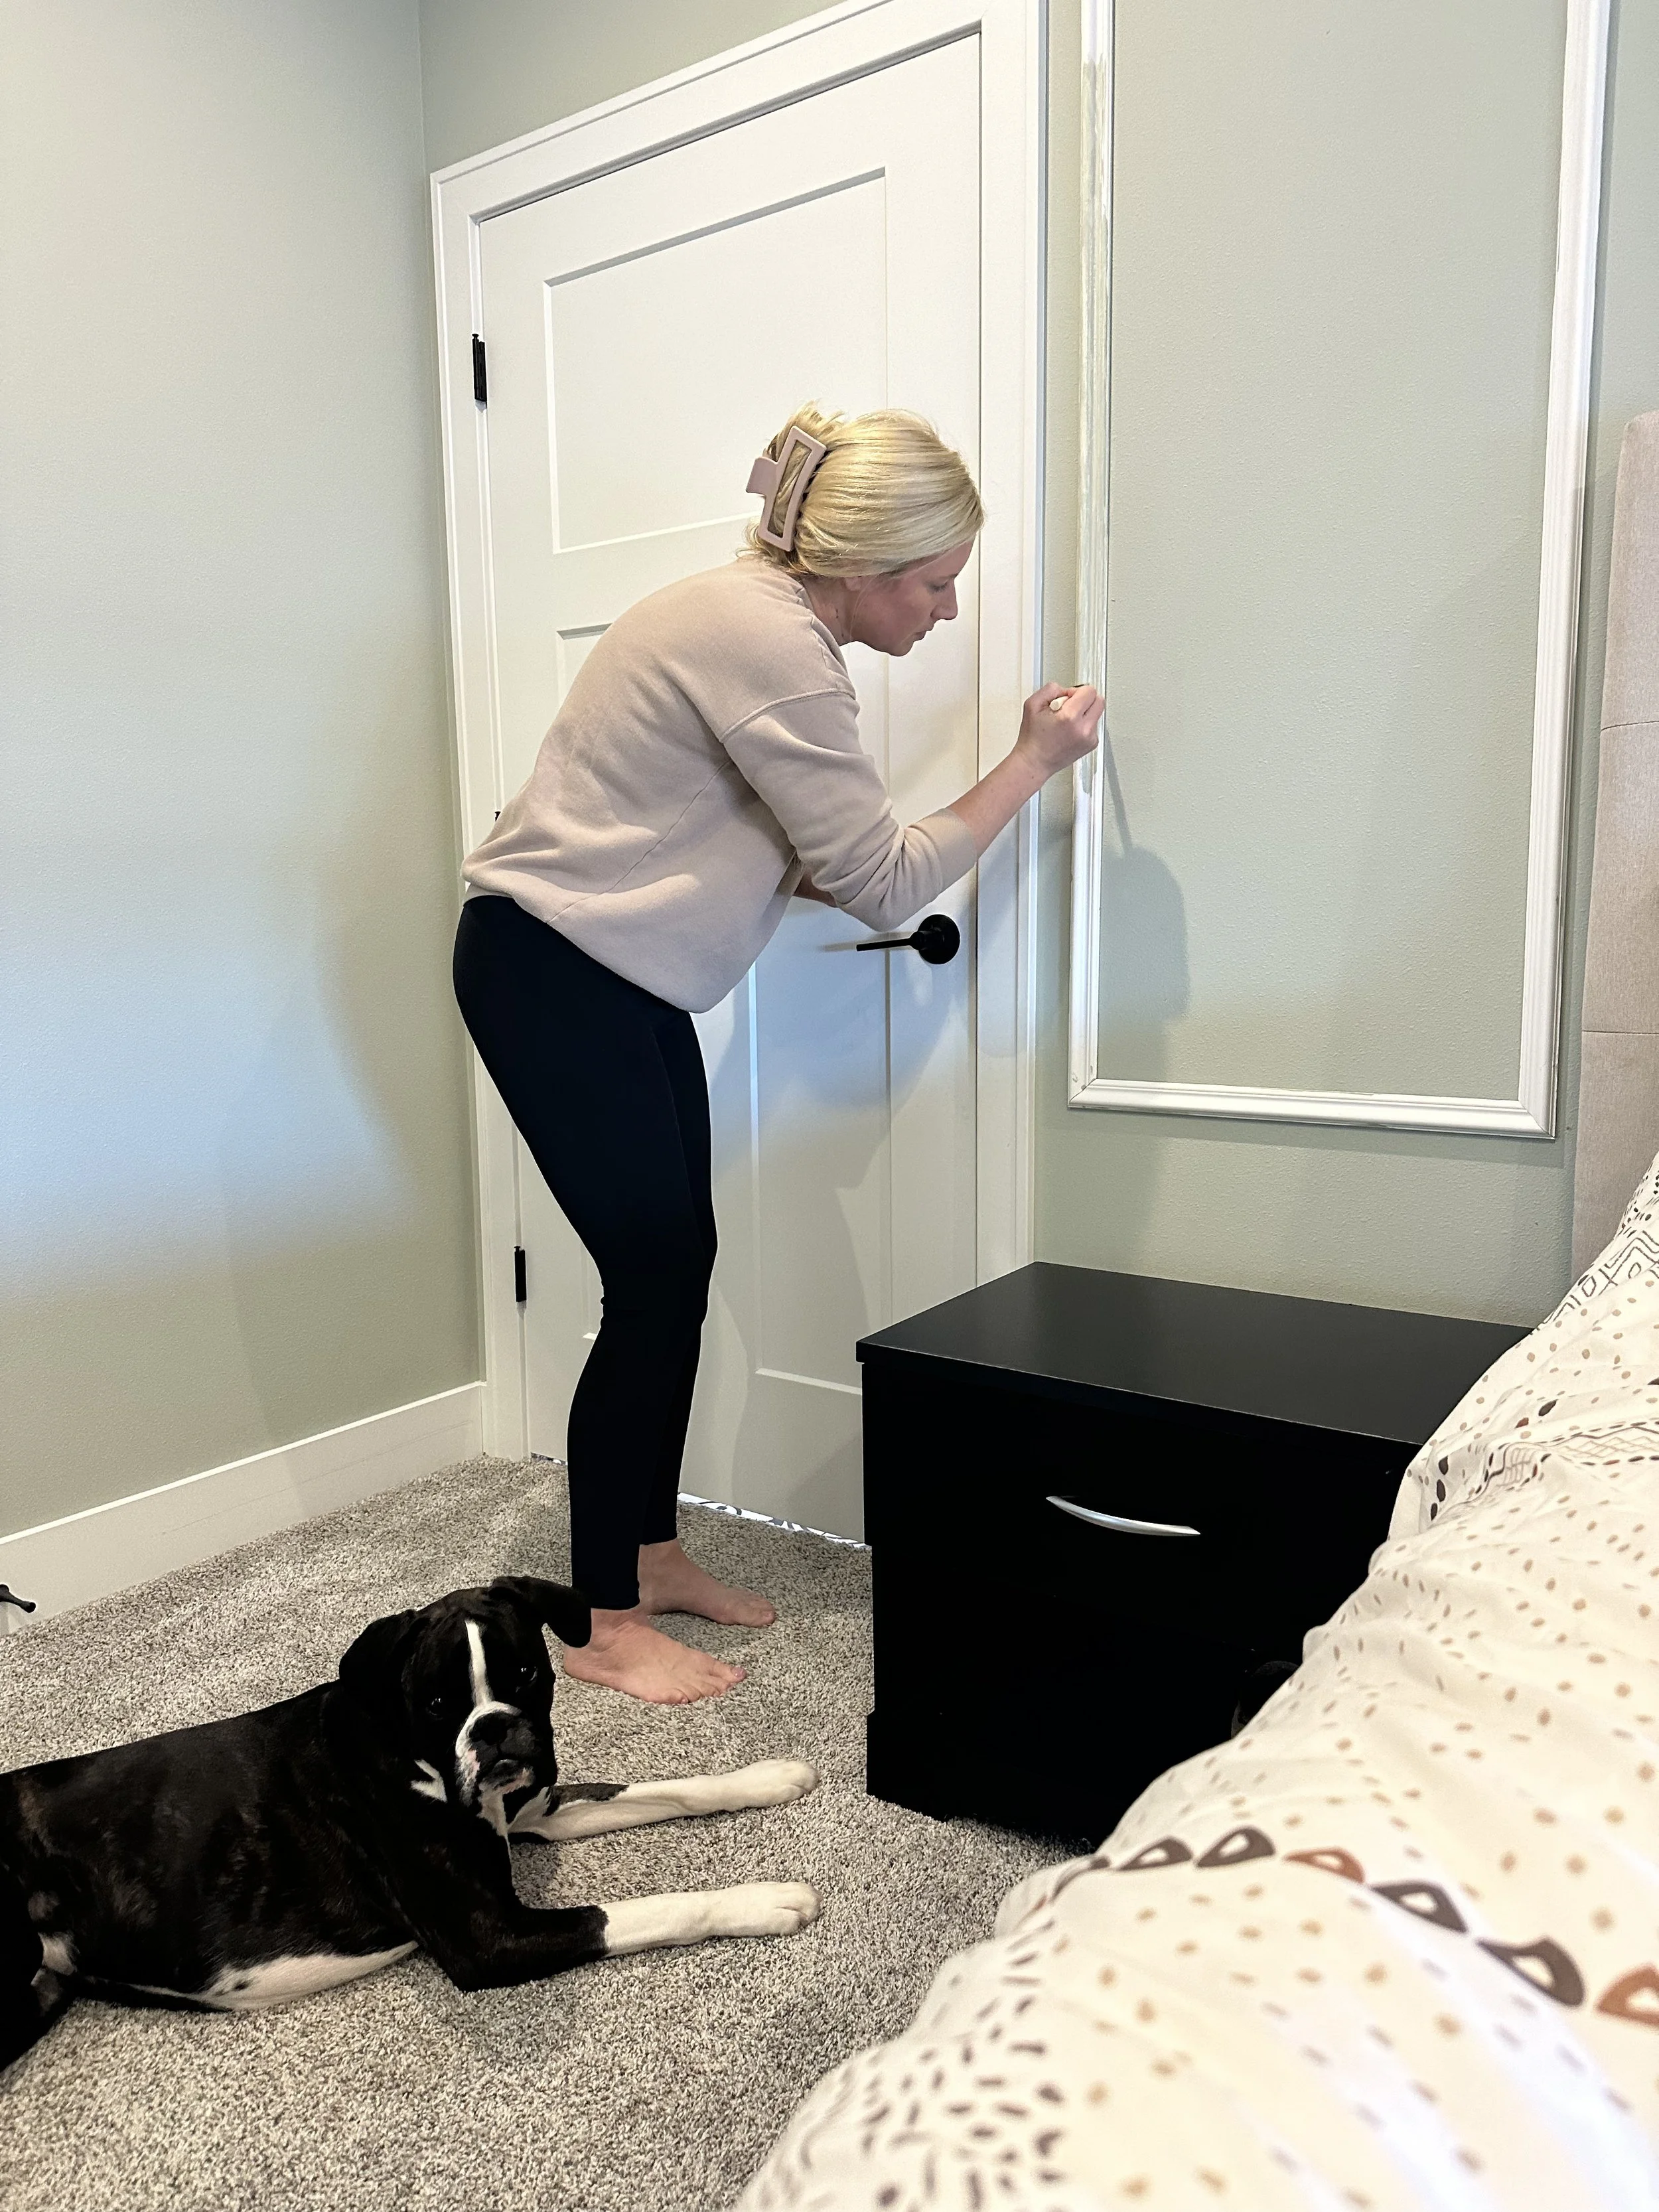
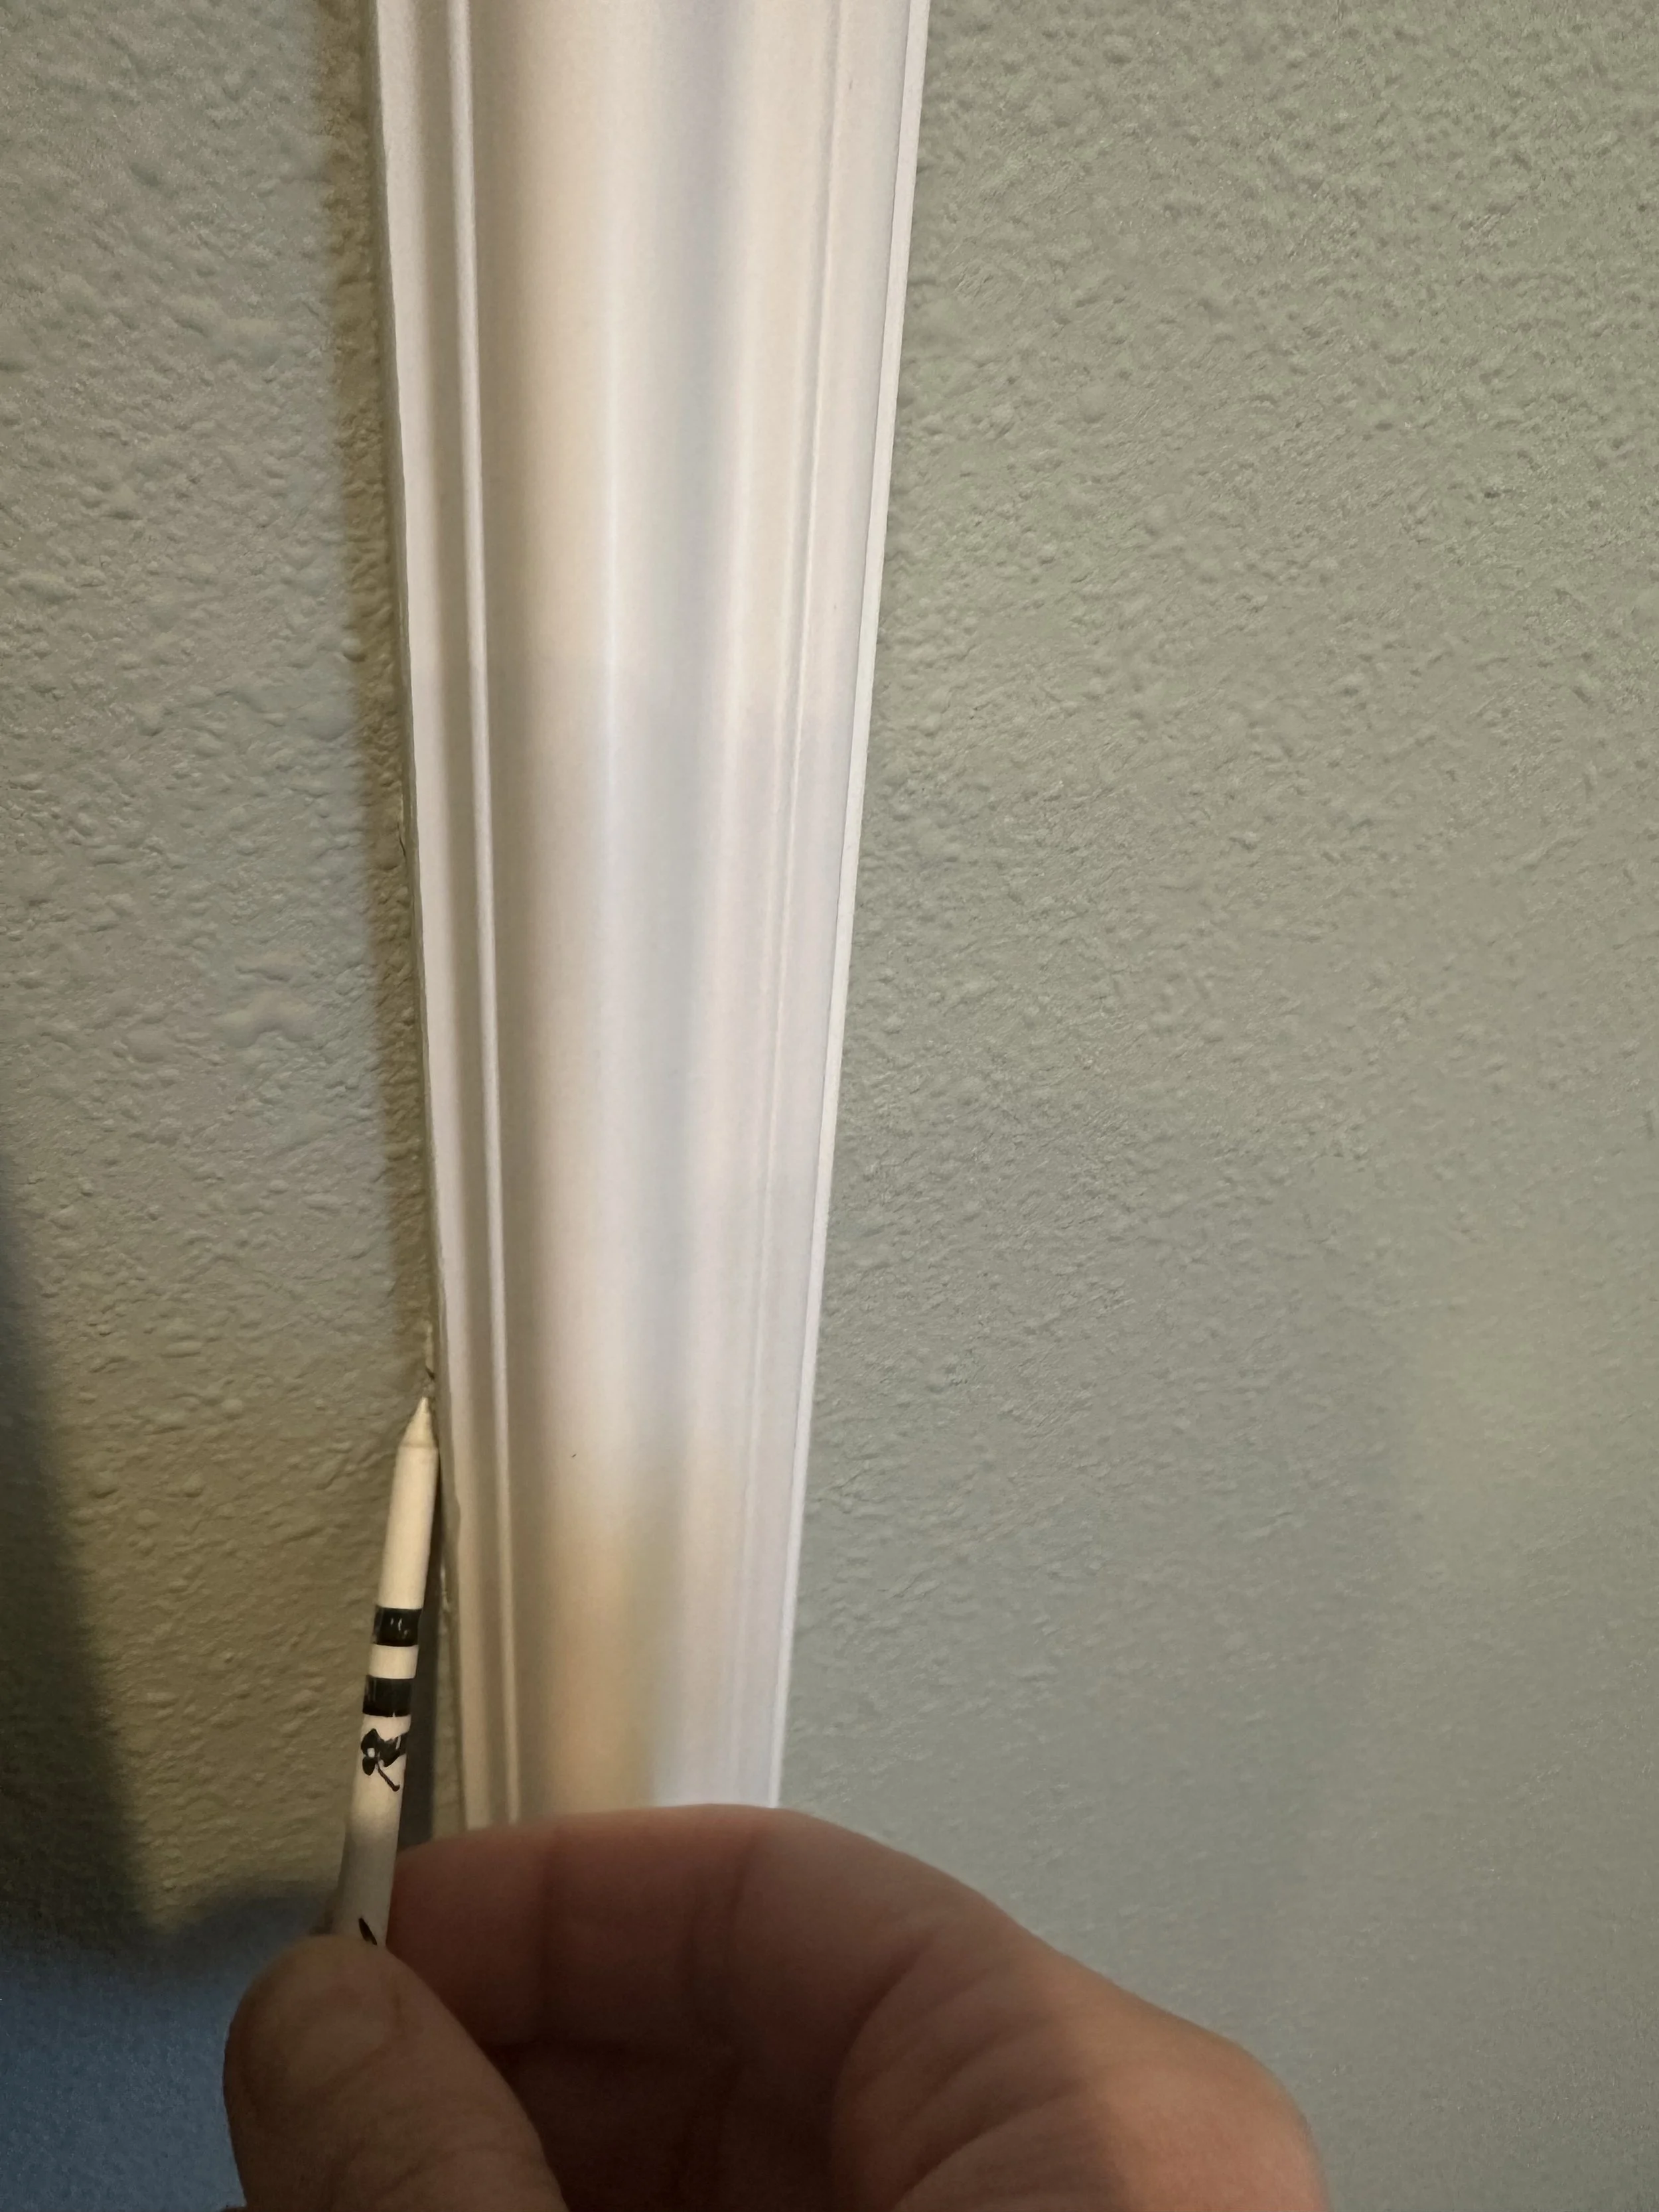
I purchased a wall molding kit that included instructions for outlining the design with pencil and attaching the pieces using liquid nails. Straightforward if followed correctly but… I decided to customize the layout, which meant calling in my contractor husband to trim a few pieces to achieve the exact proportions needed. He also helped me measure and pencil the outline on the wall as he is more detail oriented than I am. :) Then I glued on all the pieces, used caulk to fill in any gaps in the corners and taped the pieces to the wall to dry.
> Pro Tip: If you have golf tees laying around (they mysteriously appear in the laundry at my house) they work great for removing excess glue from the edges of the wall molding.
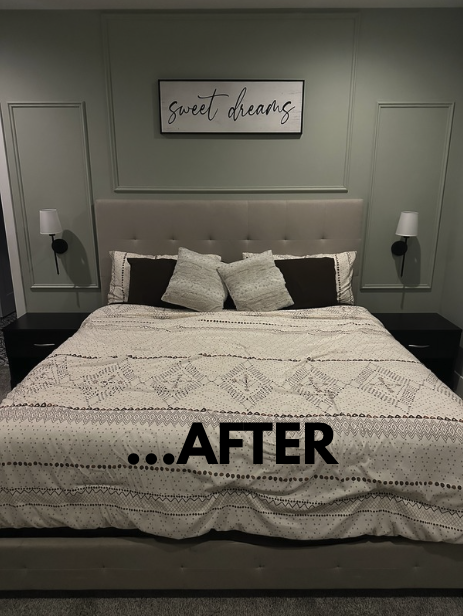
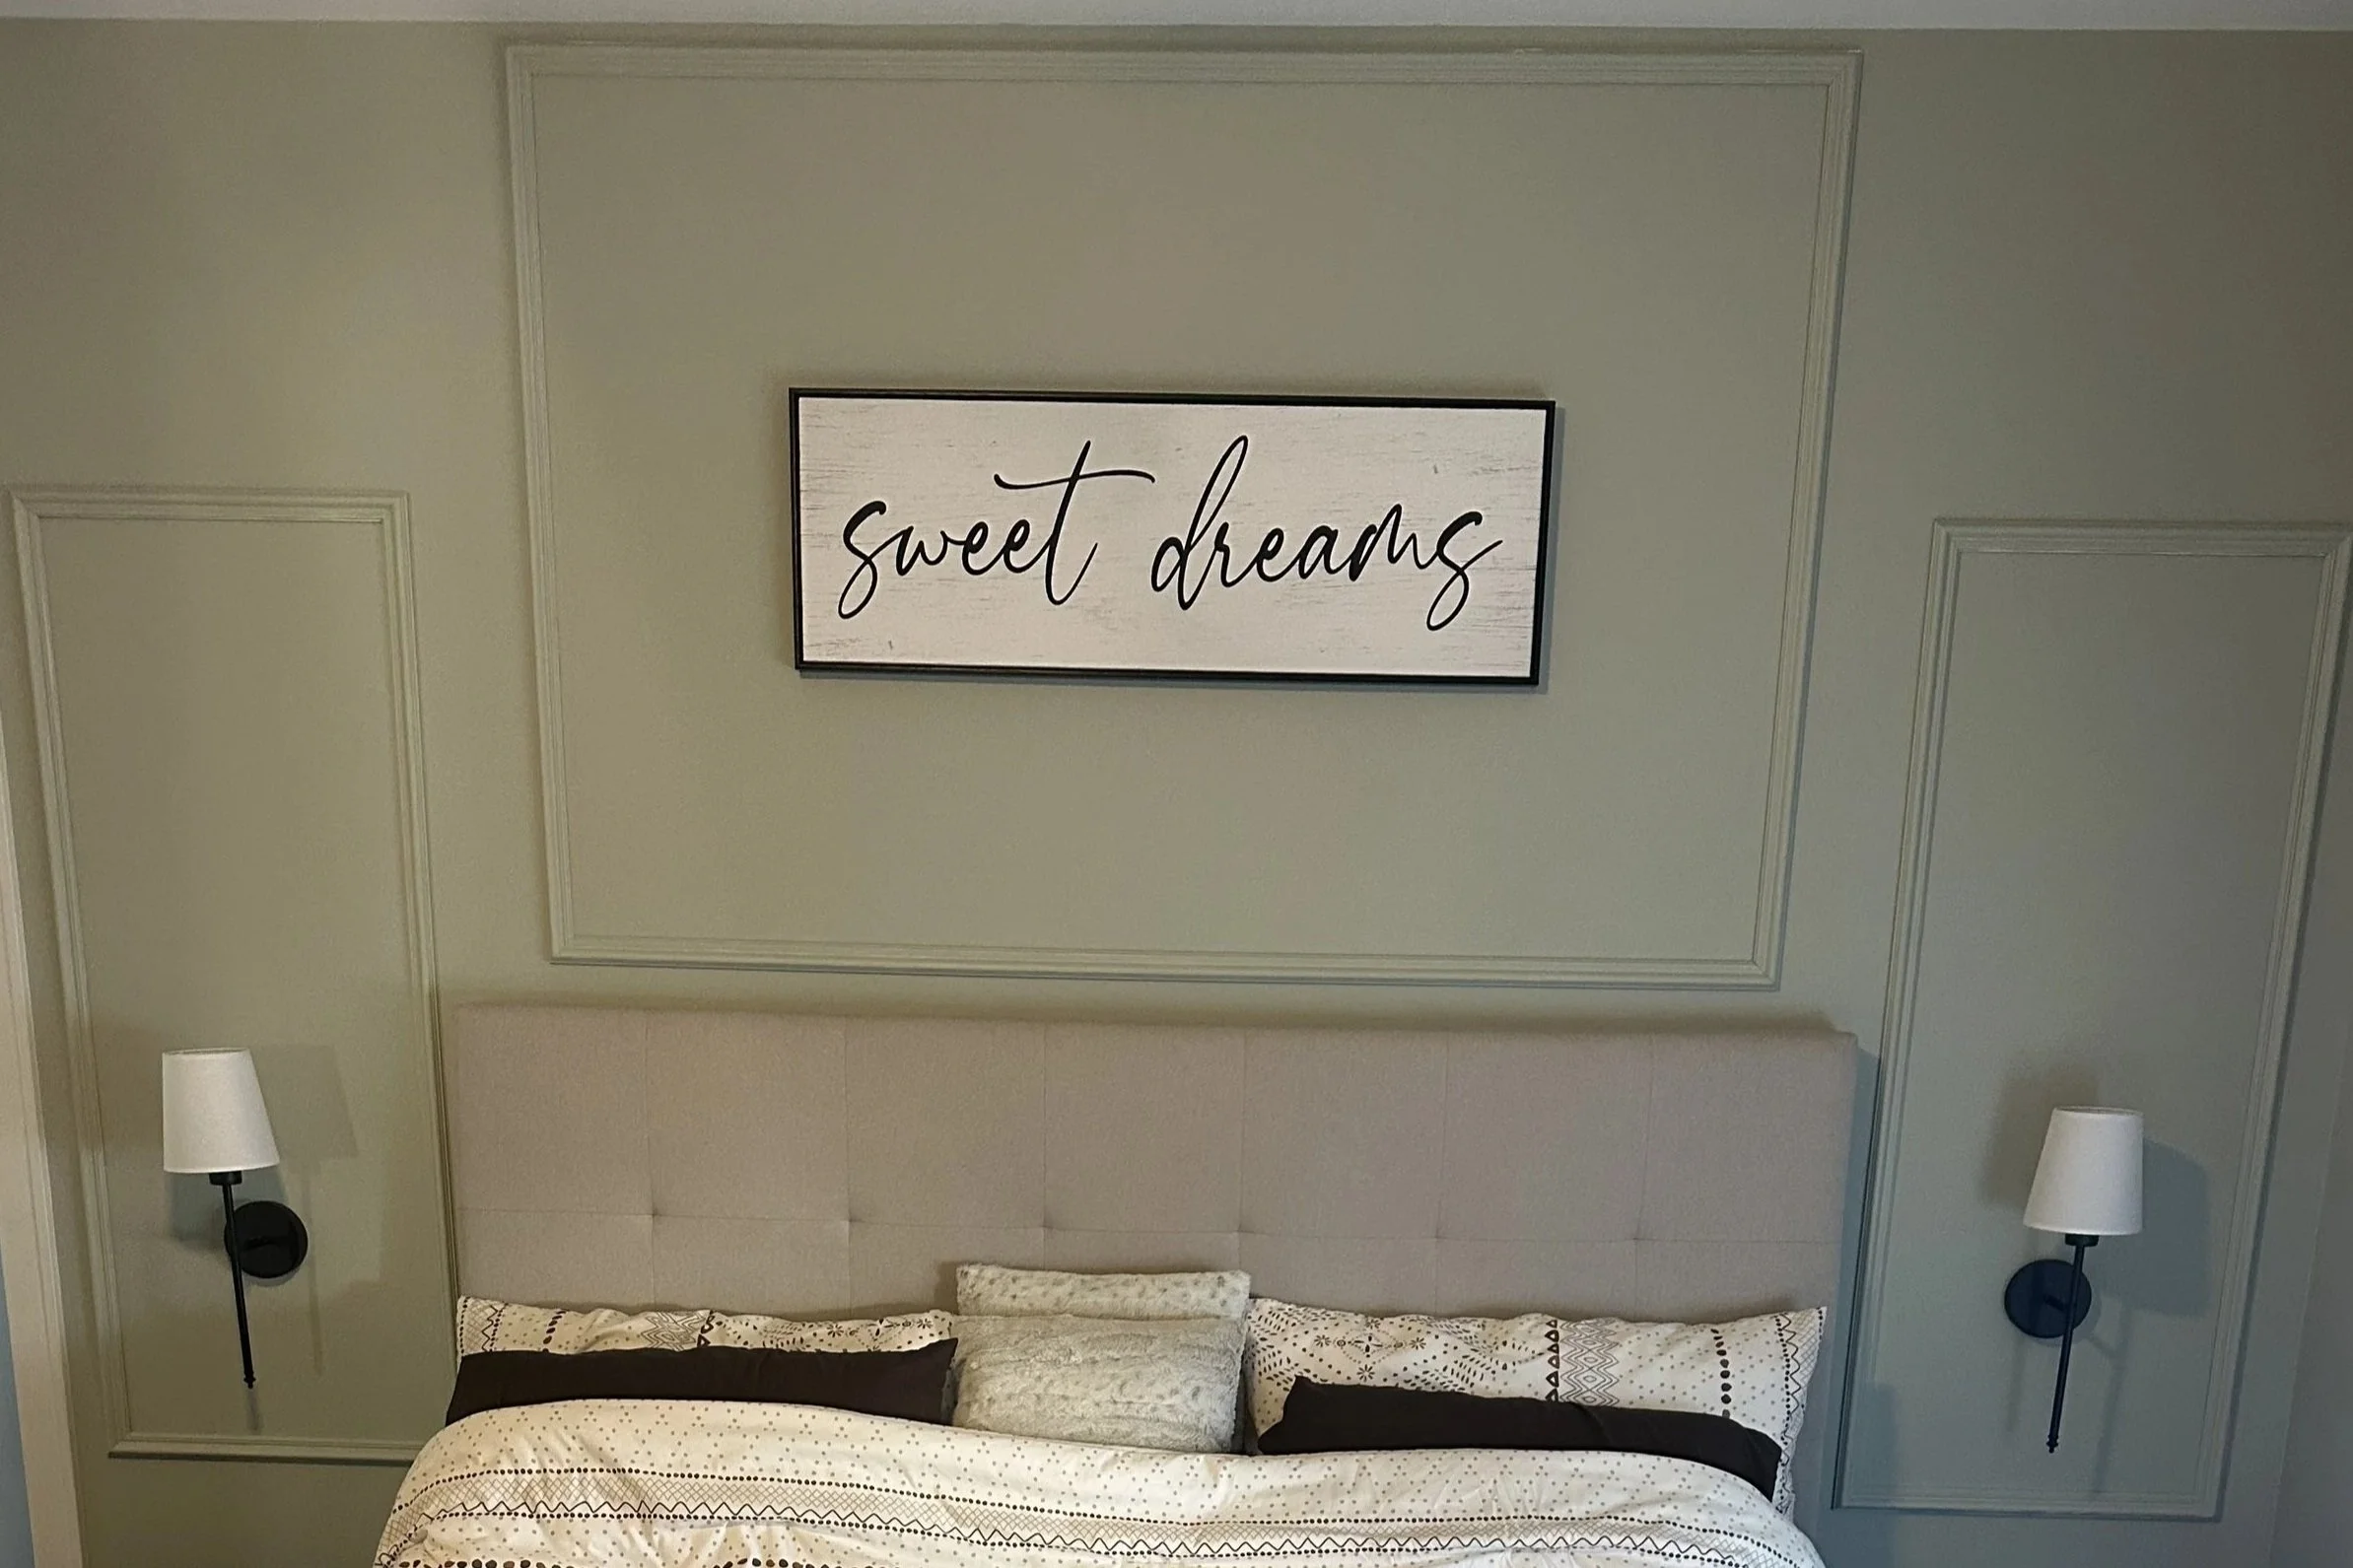
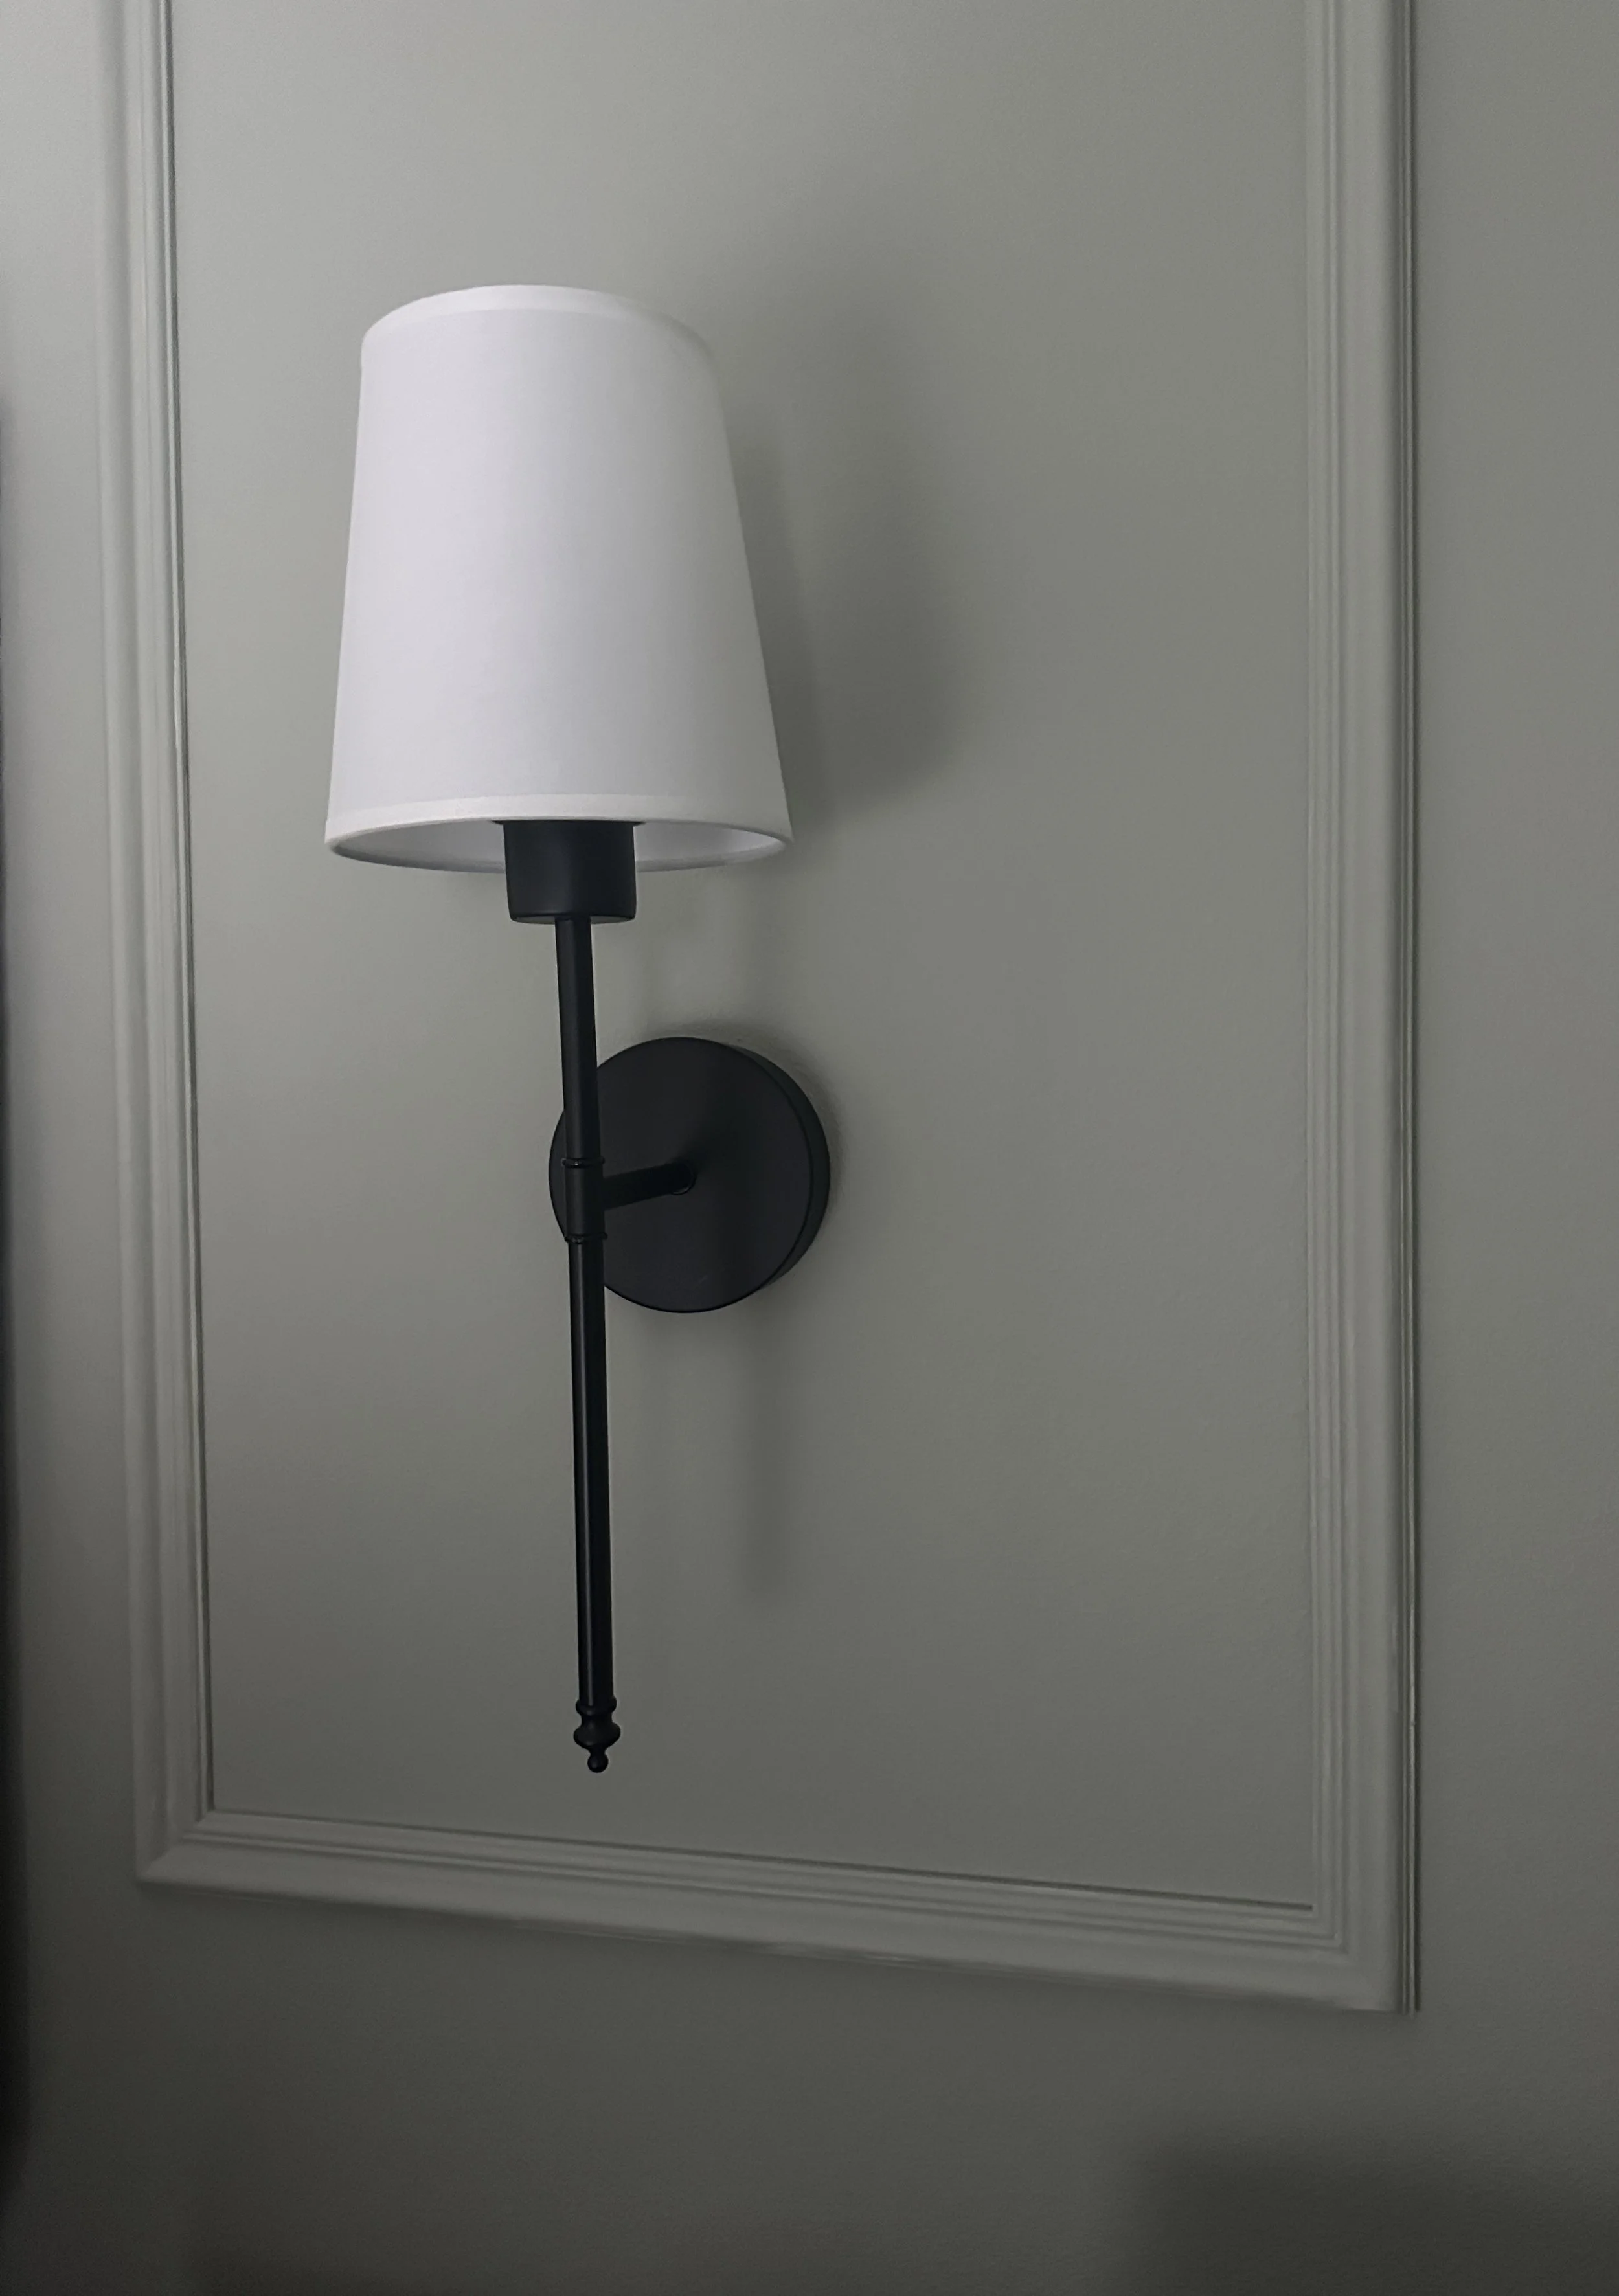
Step 3 - Paint & Accent the Room
Once the molding was fully dried, I painted all of the pieces to match the wall color (SW 6191) for a seamless, built in look. Next comes the fun part, which is styling the space. I installed new wall sconces to add warmth and sophistication, then layered in fresh bedding for extra texture and contrast. The chocolate microfiber sheets were a great find — soft, high quality, and budget-friendly — while the comforter introduced just the right amount of pattern to complete the room.
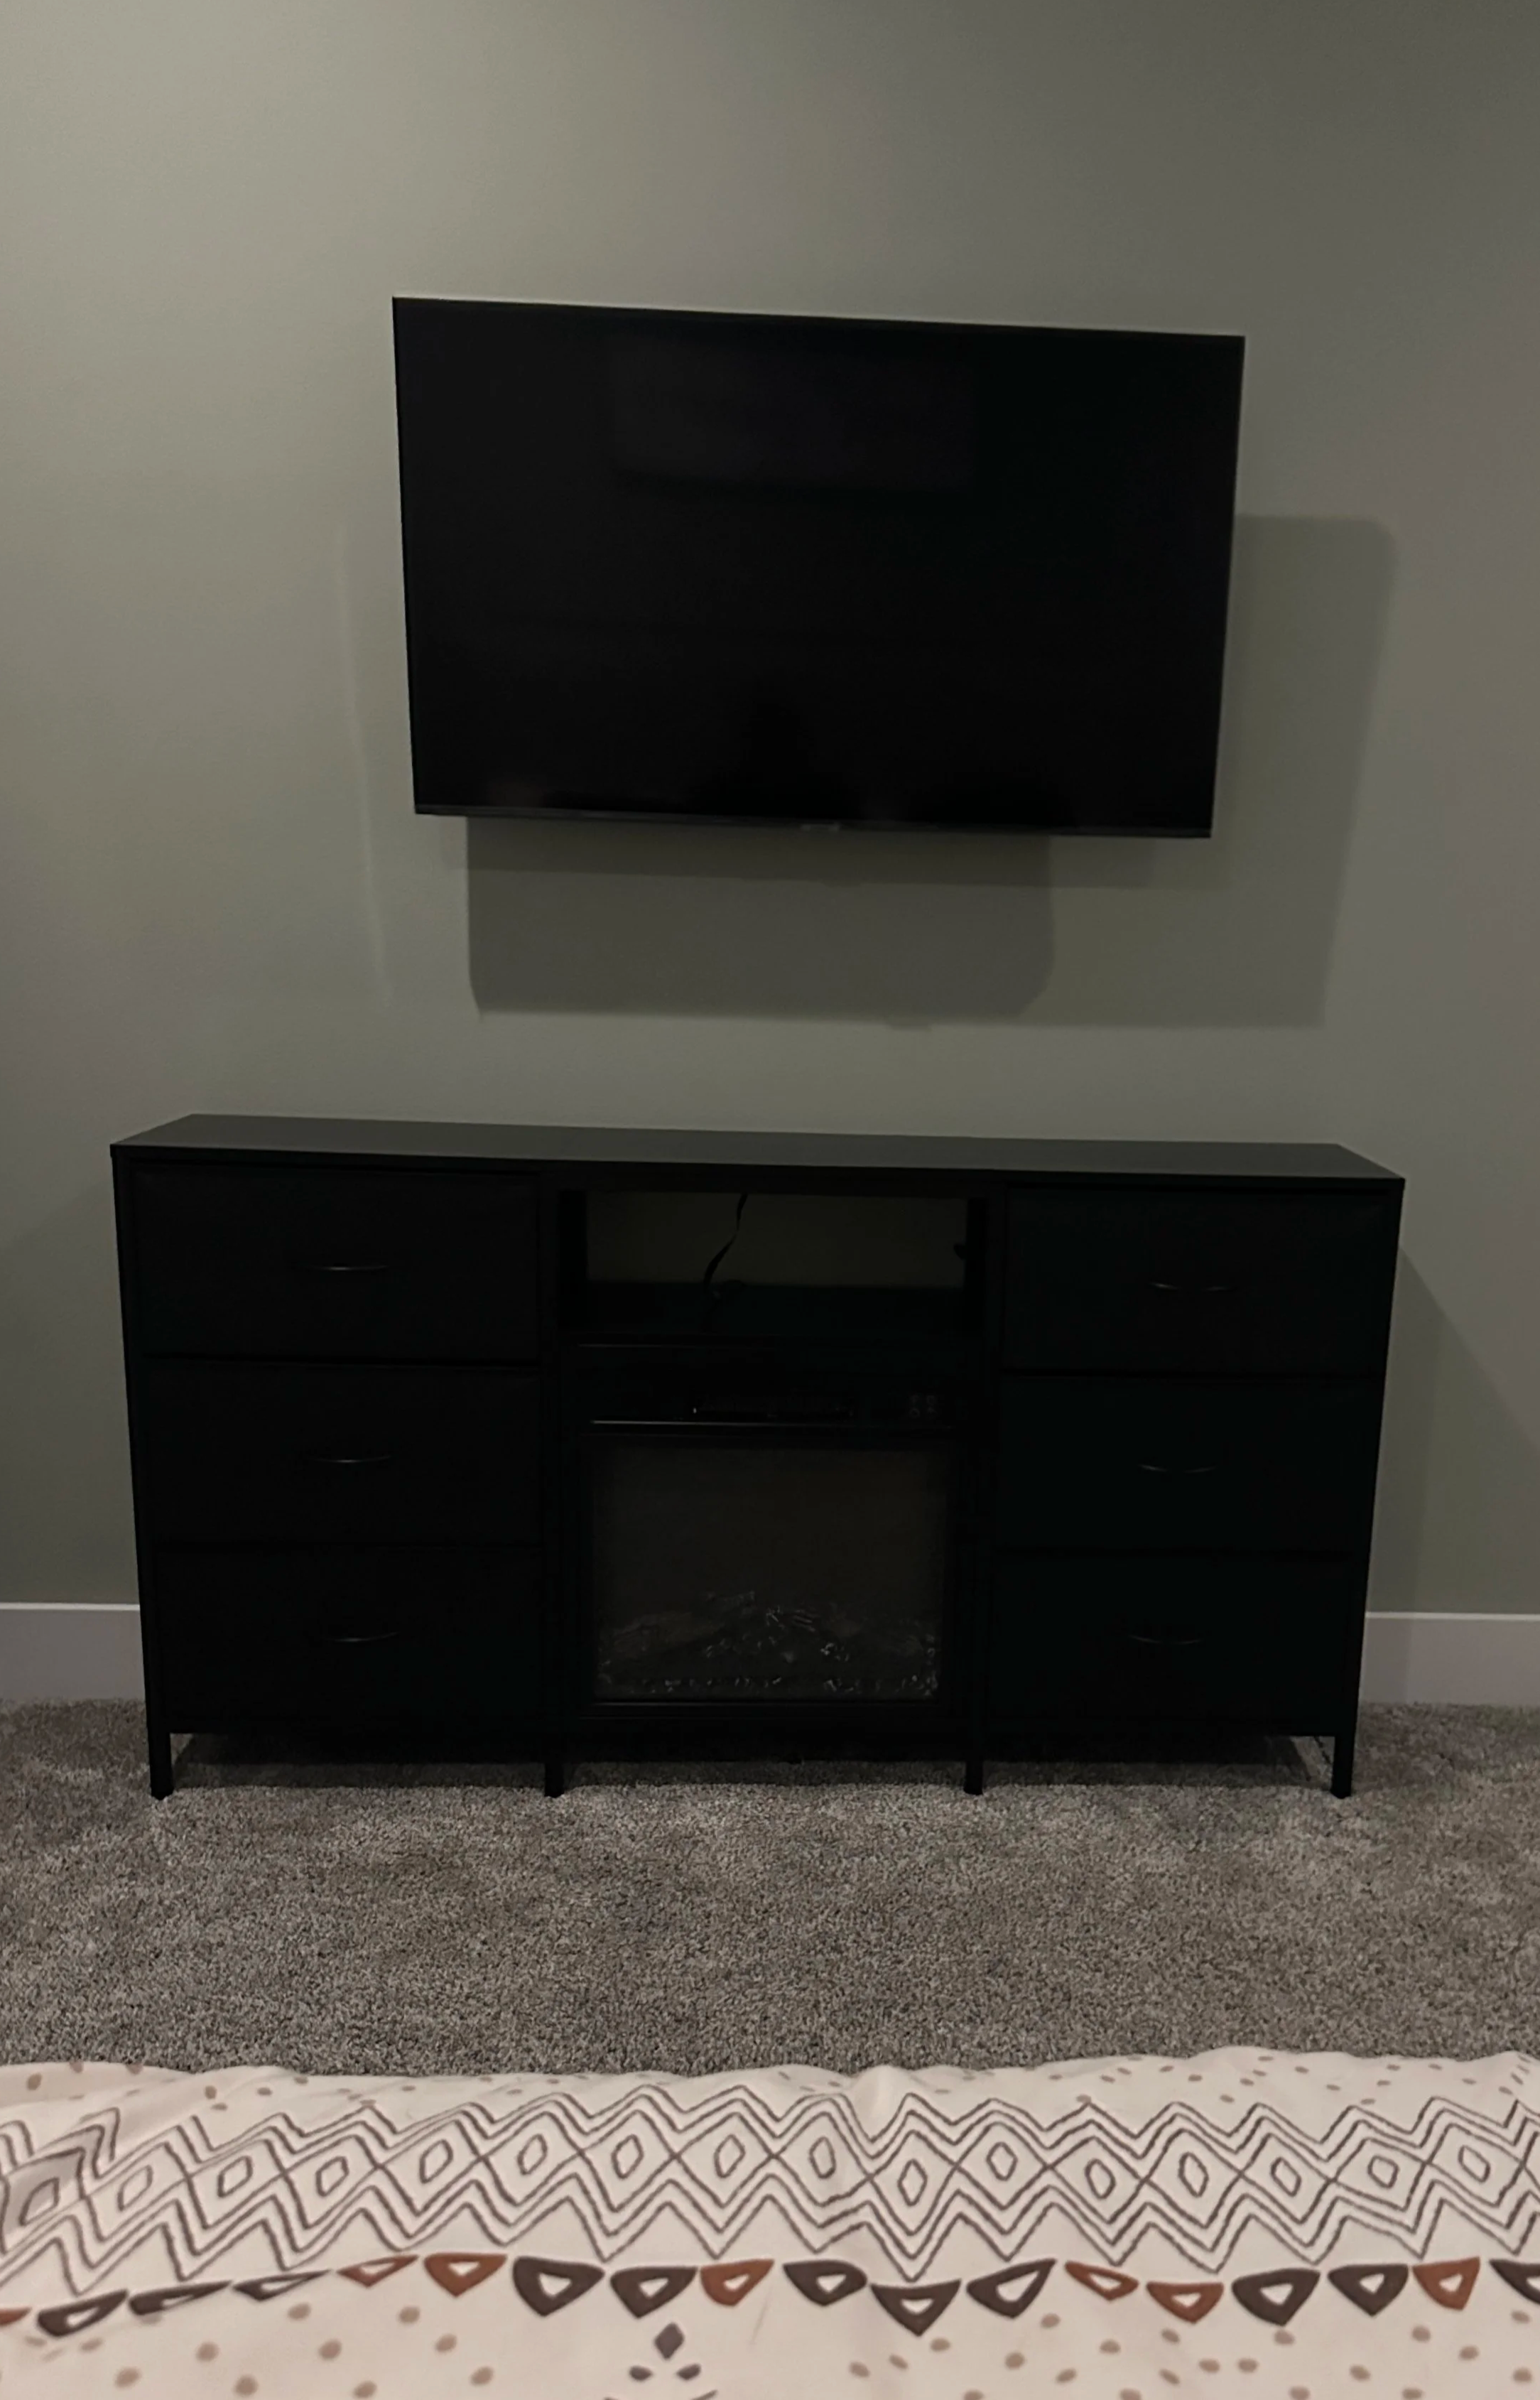
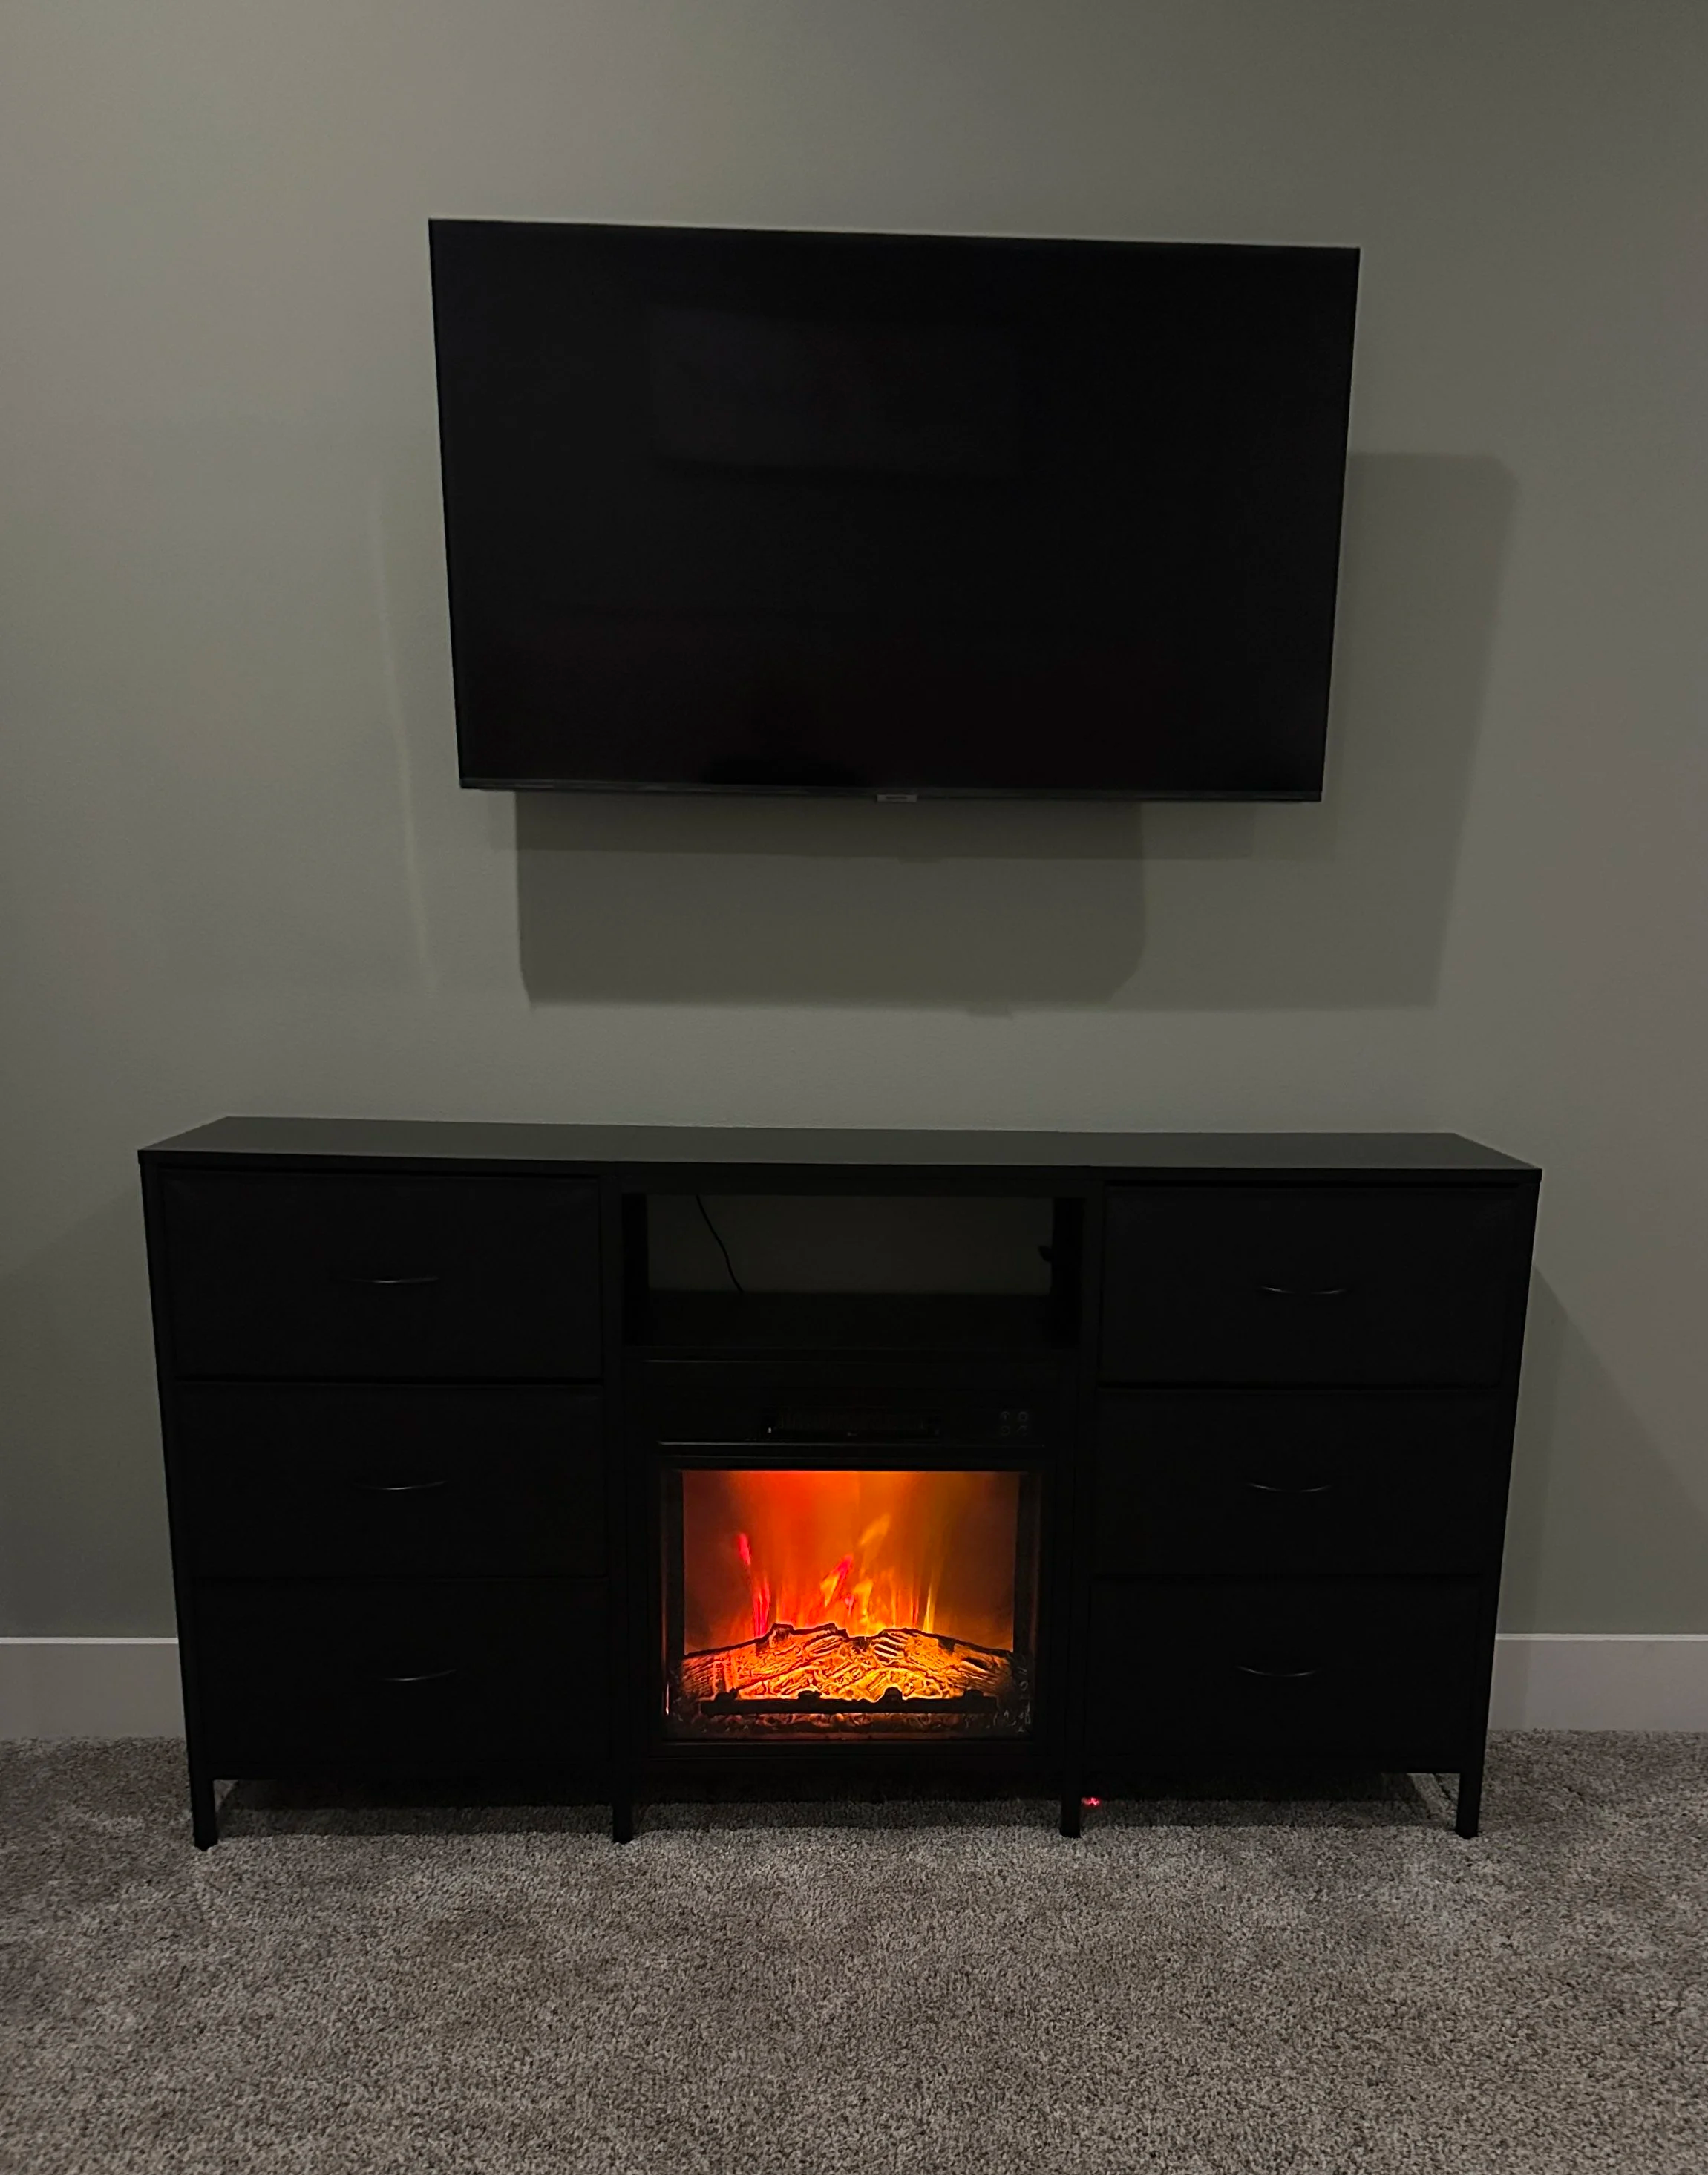
I’ve been exploring ways to incorporate a fireplace into our bedroom without sacrificing valuable square footage. This dresser-entertainment center offers the perfect solution with its built-in 18" electric fireplace, delivering warmth and ambiance without the footprint of a traditional gas unit. With customizable flame colors, an adjustable temperature, and a convenient remote timer, it’s ideal for cozy evenings. It’s also versatile, lightweight, and easy to assemble—making it a practical yet stylish addition to the space.
>Pro Tip: If you plan to paint your molding, apply the first coat before attaching the pieces to the wall. I did not do this but it would make coverage easier and save time later.